ConvertPlug is an easy-to-use WordPress plugin that helps you transform traffic into leads.
Visual Composer has been a widely used page builder across the world.
Therefore, we have come up with the ConvertPlug addon for Visual Composer that allows webmasters to build forms within a page.
Must have:
• ConvertPlug
• Visual Composer
For users who use ConvertPlug along with Visual Composer, we have an addon called the ConvertPlug addon for Visual Composer available in the Addons installer.
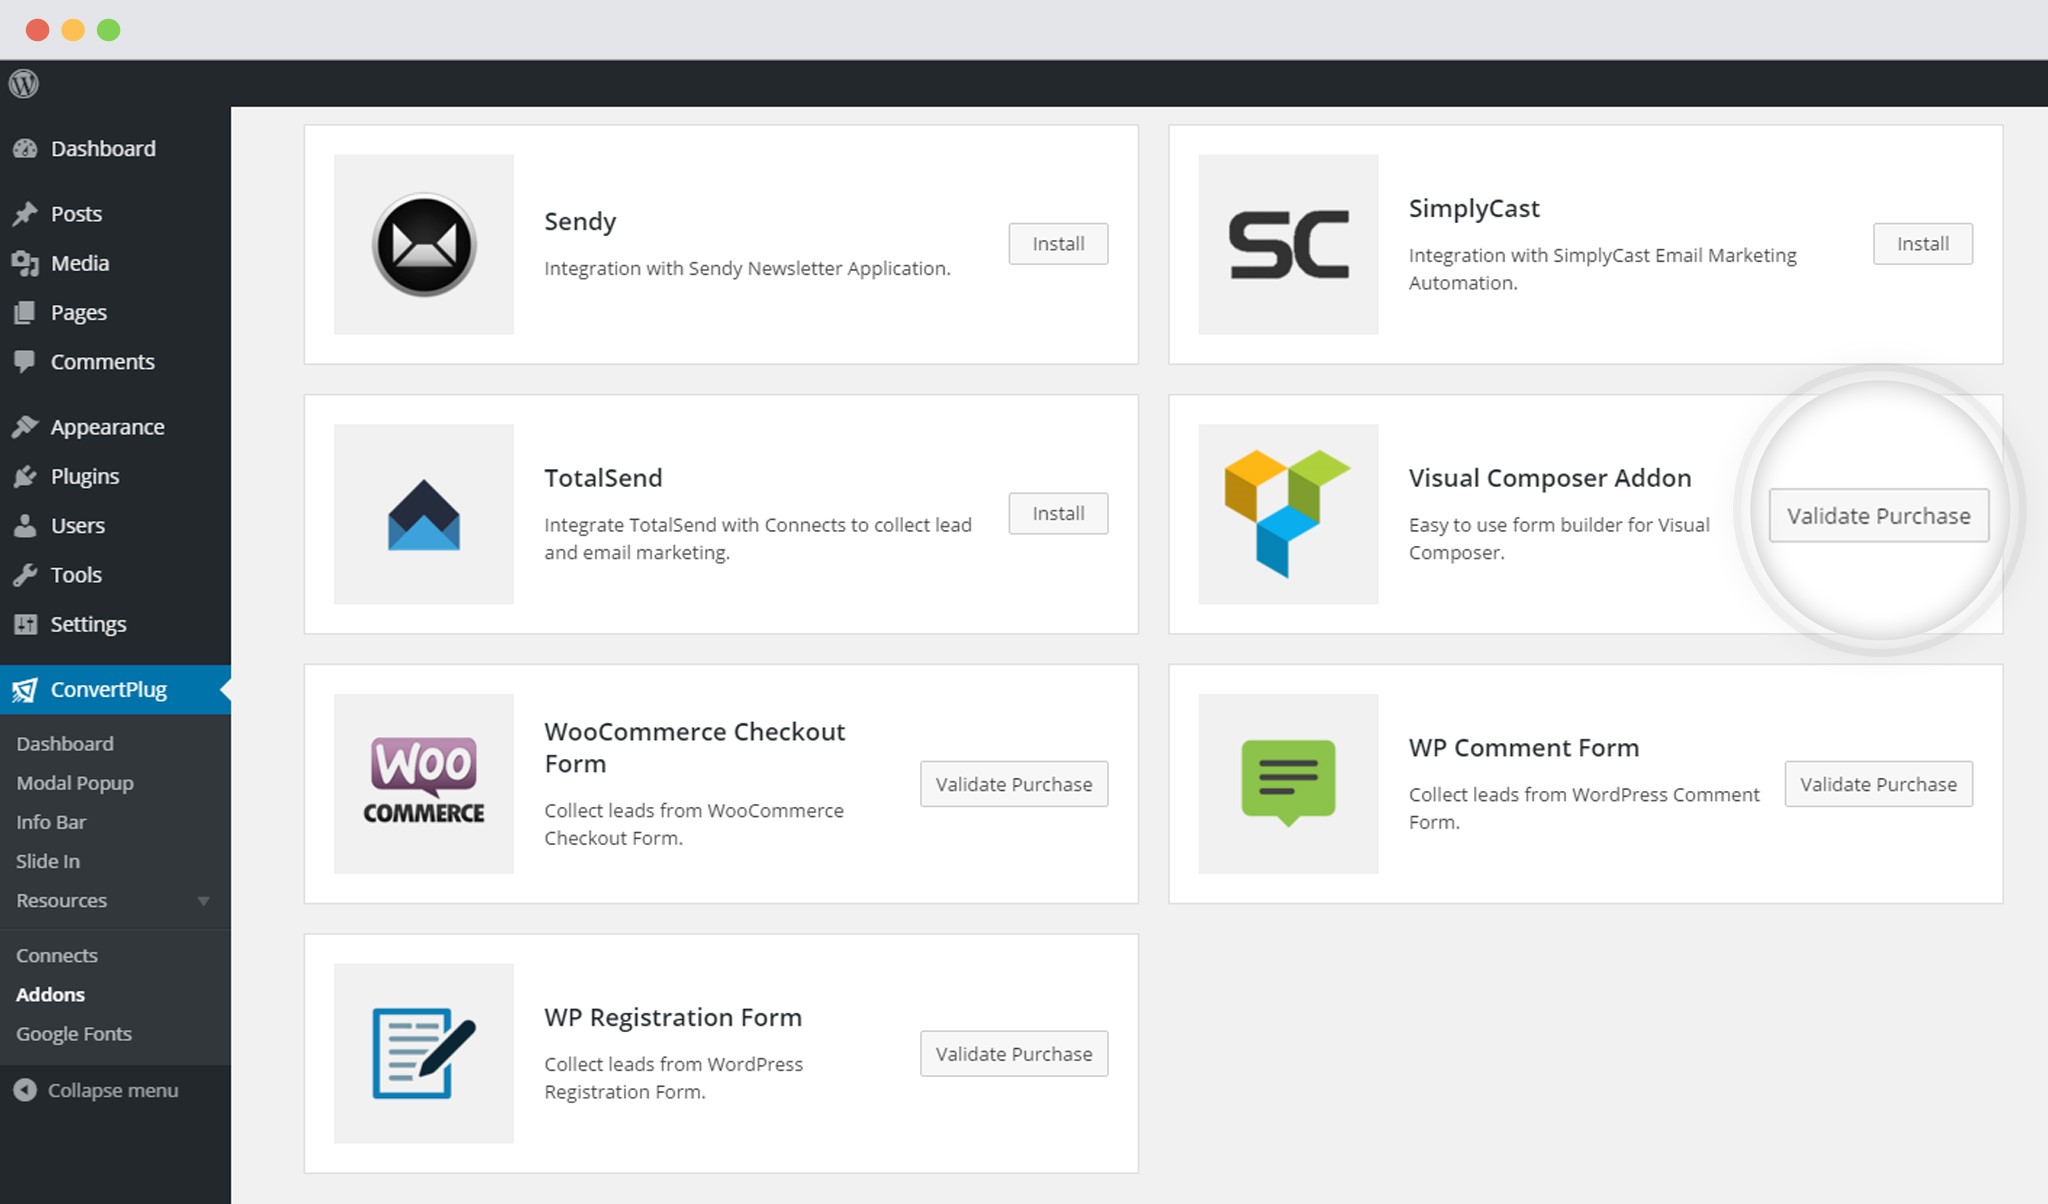
Note: If you are a direct customer (bought a direct copy from us), you will have to register your copy of ConvertPlug to validate your purchase, before installing this addon.
In order to learn how to use the Addon Installer in ConvertPlug, you can refer to the article here.
The following steps will help you use the ConvertPlug Addon for Visual Composer.
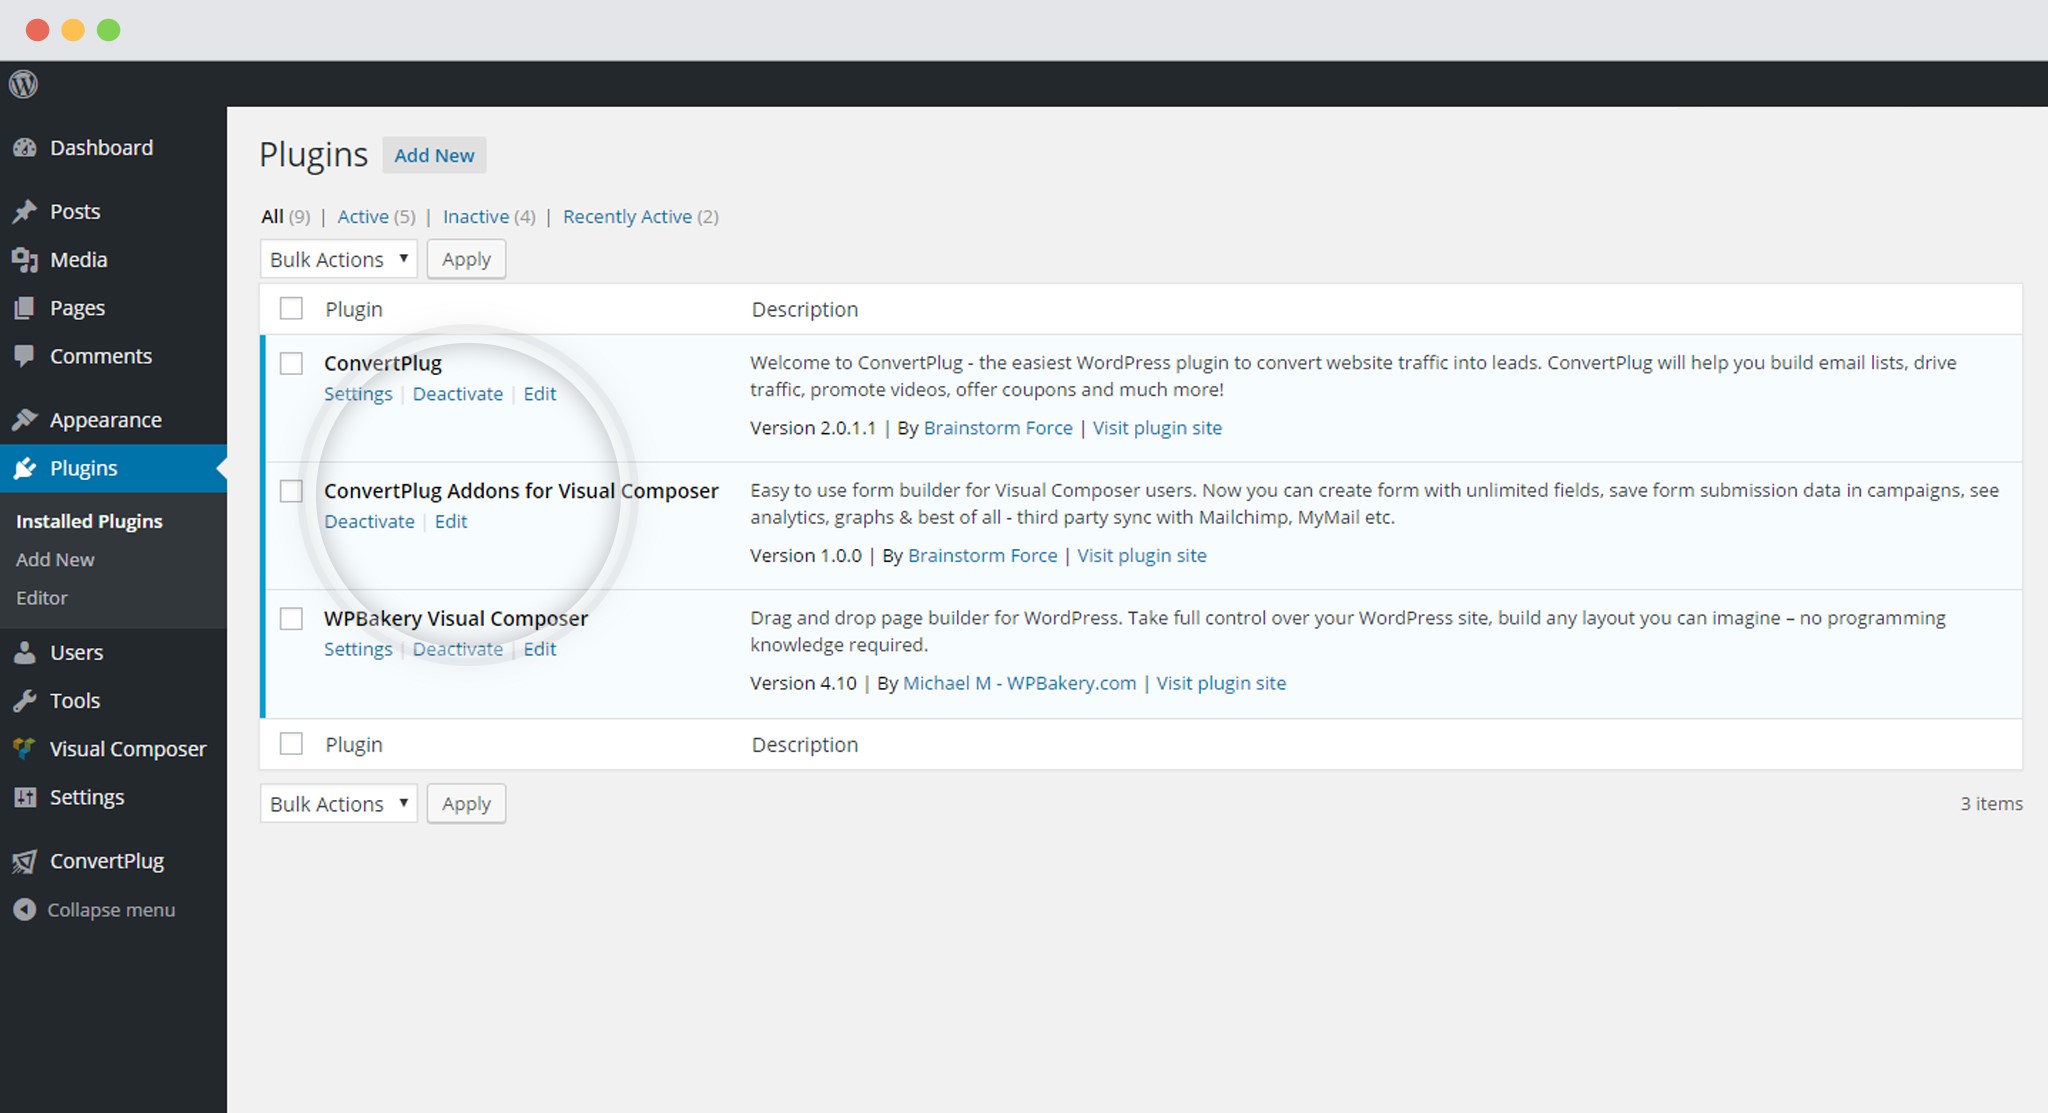
1. Download and install the “ConvertPlug Addon for Visual Composer“
2. Edit the page in the Visual Composer Editor
Create a new page or edit an existing one.
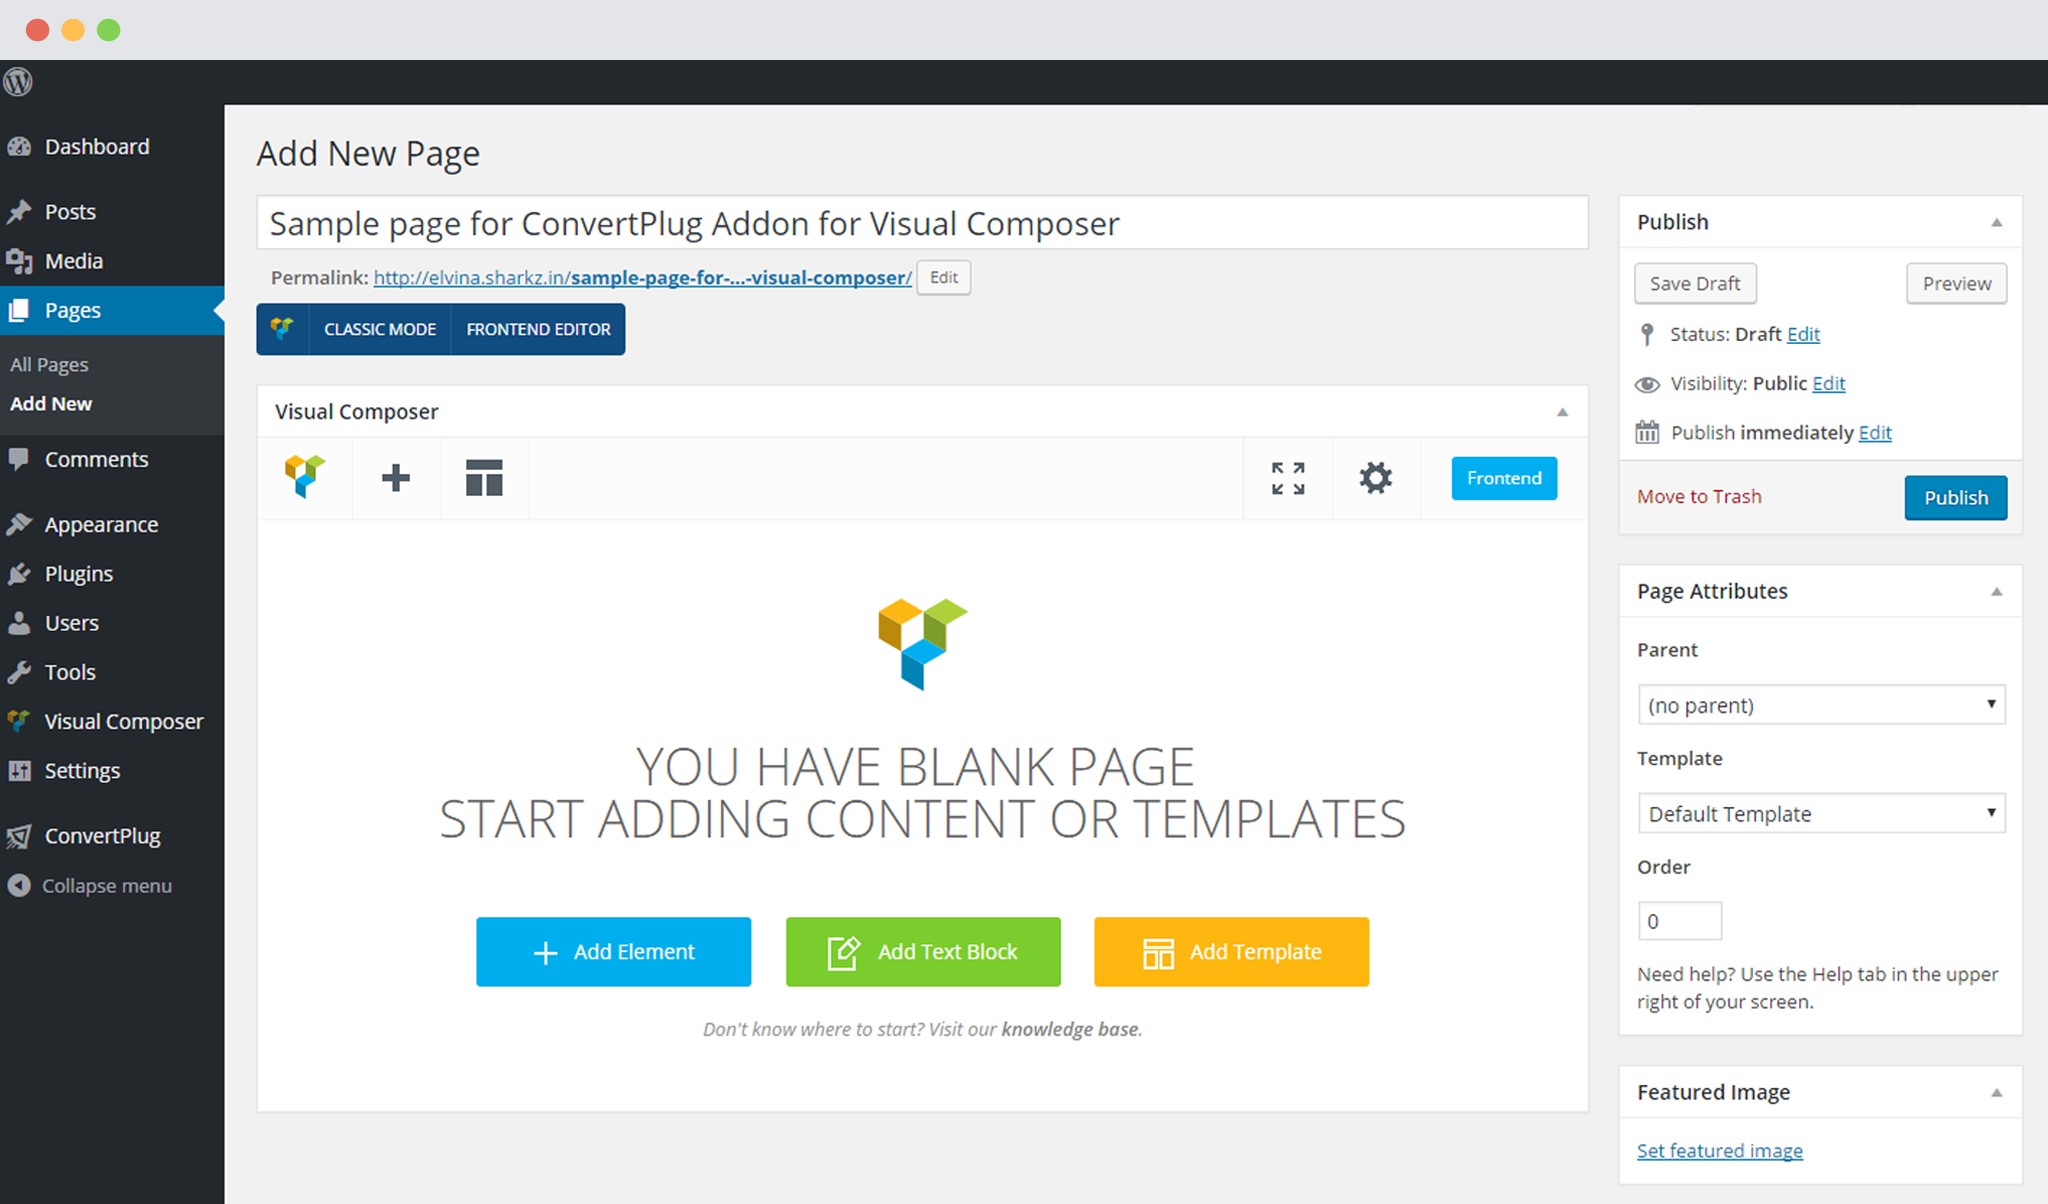
3. Design a page as per your needs
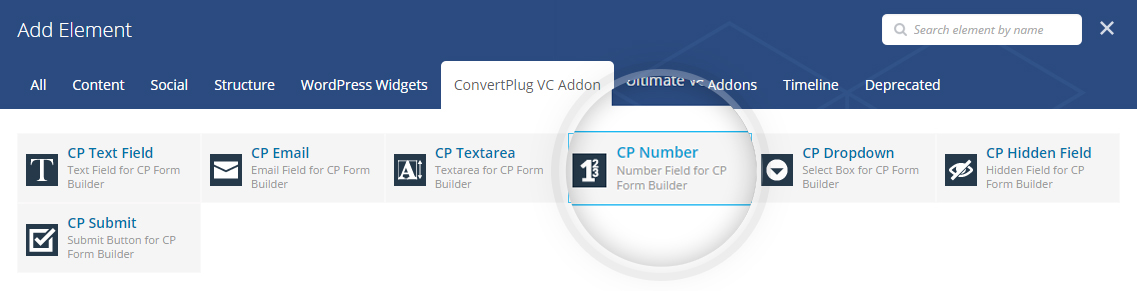
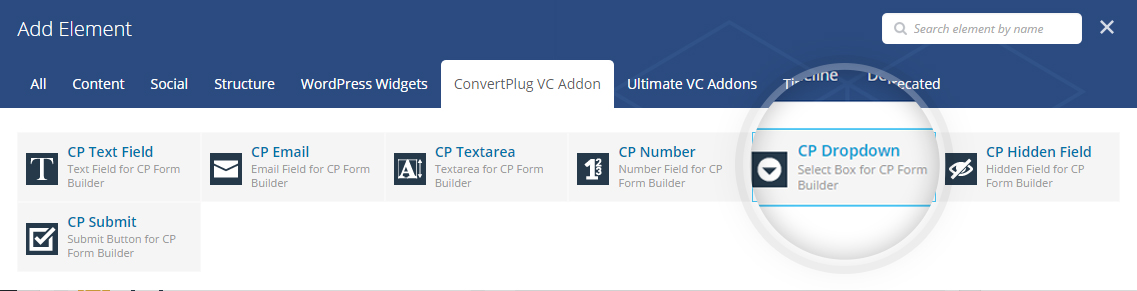
4. Add the Element and click on the ConvertPlug Addon tab
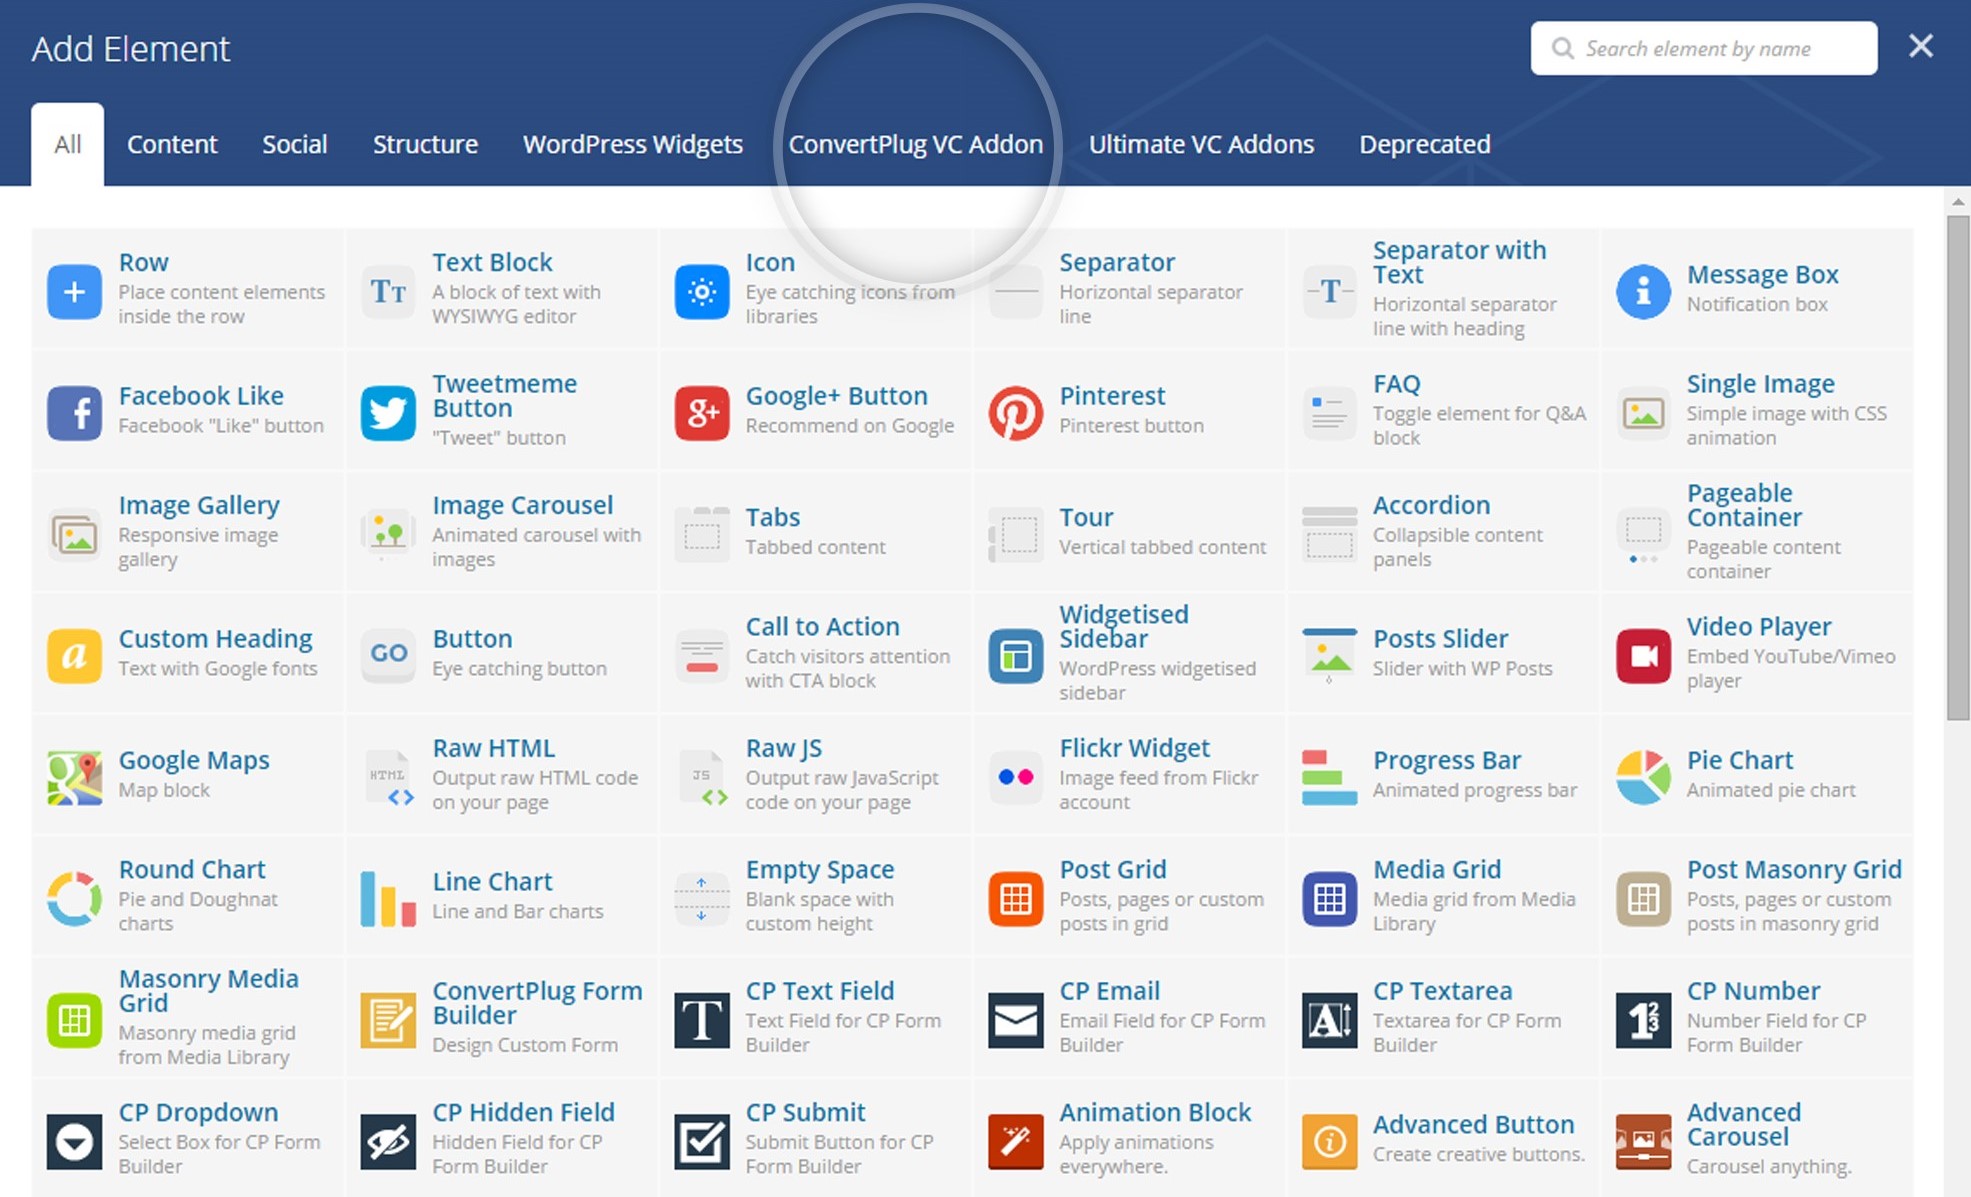
When you wish to add a form on a particular place on the page, you can select the element under the ConvertPlug addon tab.
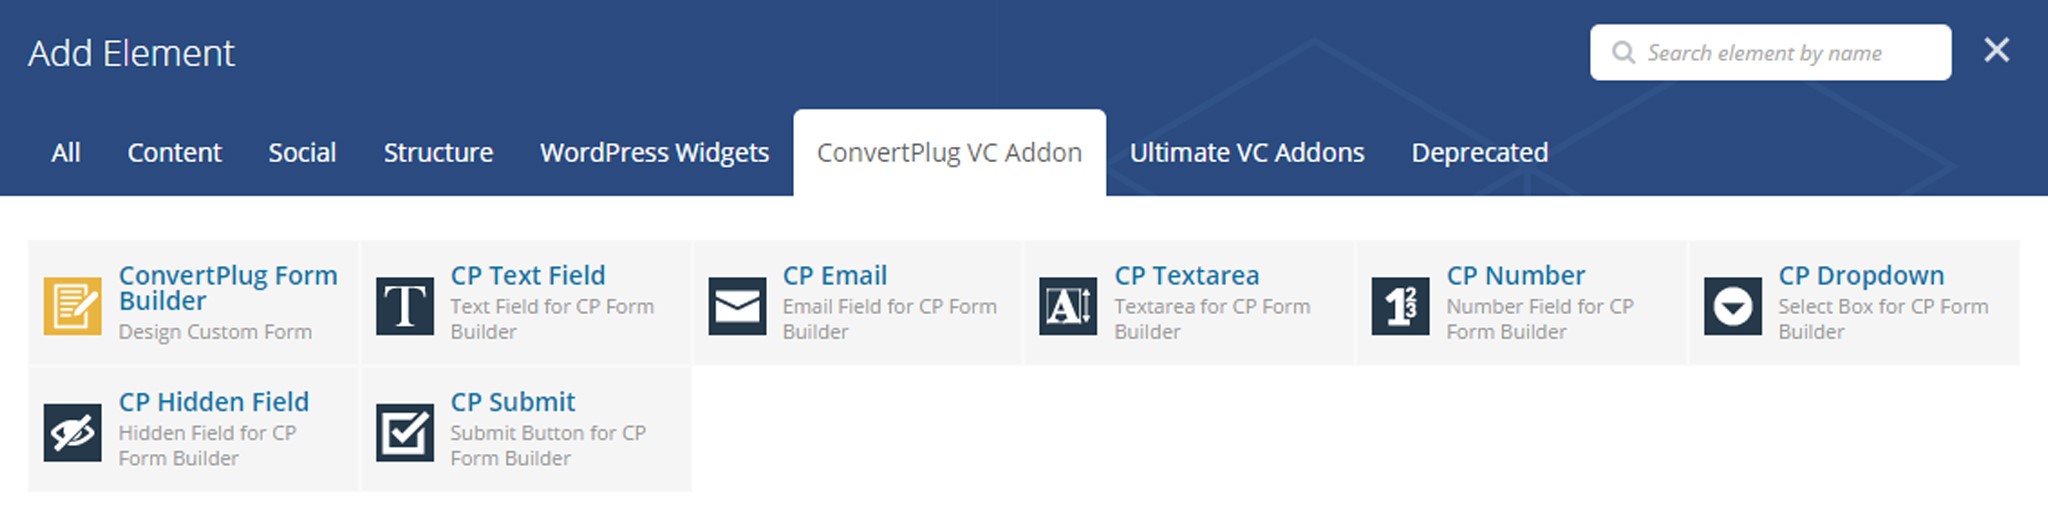
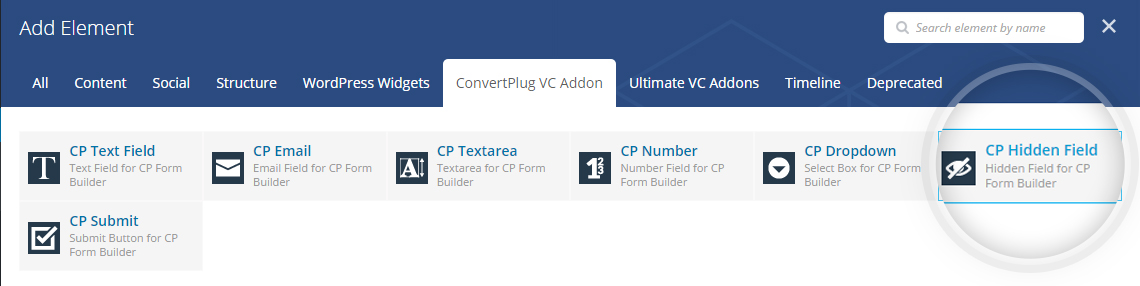
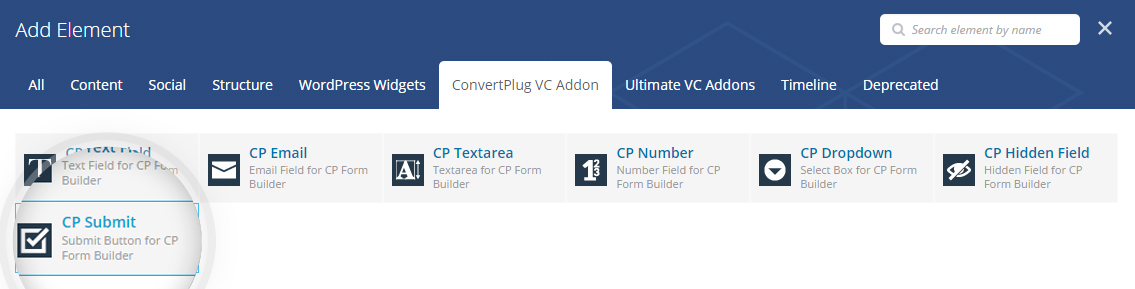
The Elements in ConvertPlug Addon
1. Form Builder
The basic frame that may contain all the other form elements in a structured manner.

The settings for a Form Builder:
Submission Settings
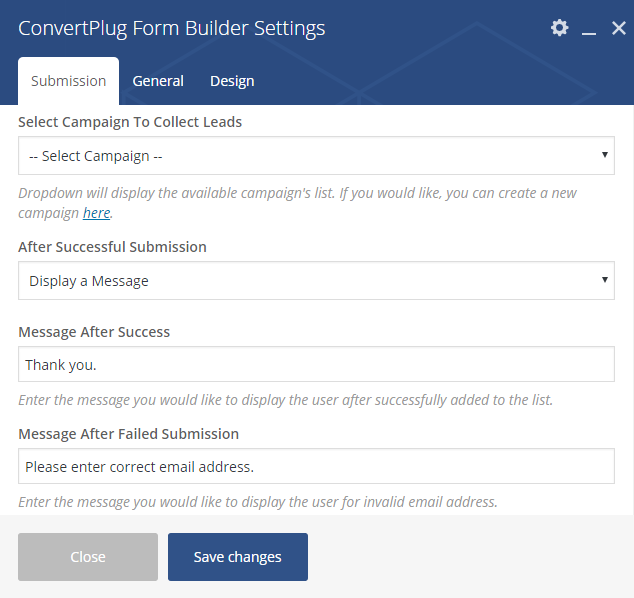
Select a Campaign: Select the campaign you wish to store the submissions in. All the existing campaigns you created using Connects in ConvertPlug are listed in the drop down menu.
Action after Successful Submission: You can decide whether you wish to display a message or redirect the user to another page after he has filled the form successfully.
If you select to display a message, you are asked to enter the message you wish to display.
In case you wish to redirect the user to another page, you can specify the URL.
Action after failure: You can customize the message that will be displayed in case there are any errors or failure during submission.
General Settings
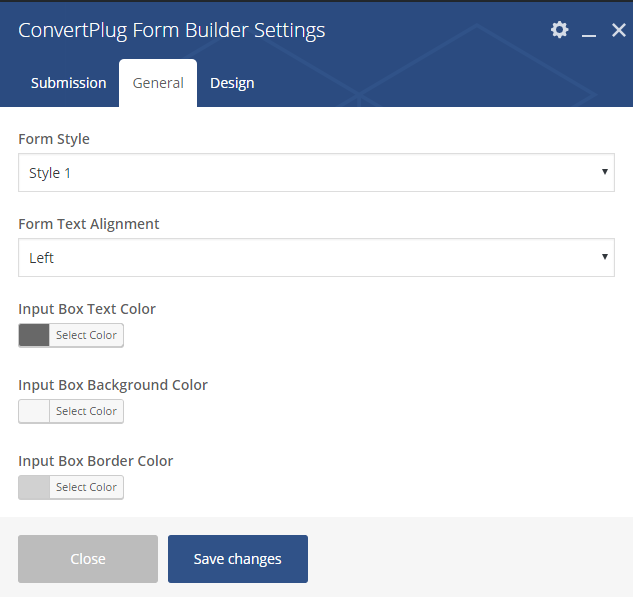
Select the Style: You can select the style of the form. There are 3 styles you can choose from.
Form Text Alignment: You can set the alignment of text to either Right, Left or Center.
Input Box Formatting: You can change the background color, the border color and the font color of all the input boxes in the form. You can also define a standard font size with vertical and horizontal padding.
Label Visibility: You are given an option to enable or disable the Label visibility. You can also format the label by editing the font color and the font size.
Design Settings
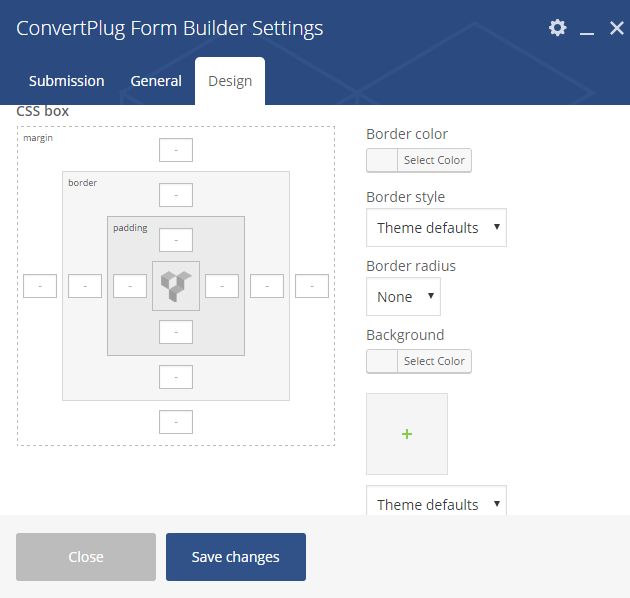
Border Formatting Options: You can change the border style, color and the border radius of a form.
Background Color and Image: You can select a background color for a form or insert an image too!
Note: The Form Builder is the most essential element that should be added. All the other CP Elements should be placed within the Form Builder.
2. CP Email
This element can be used when you wish to insert an input box that is meant to accept an email address.
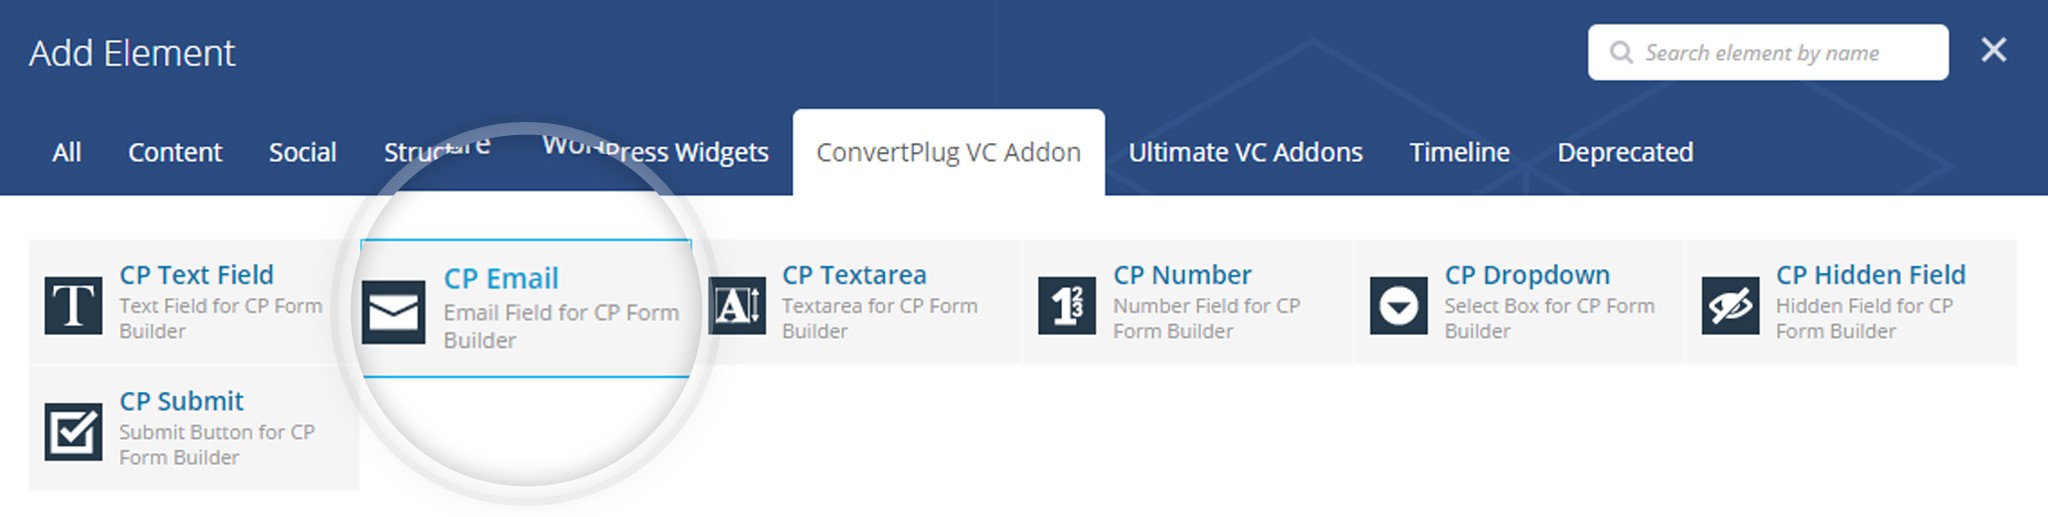
The Settings for CP Email:
General Settings
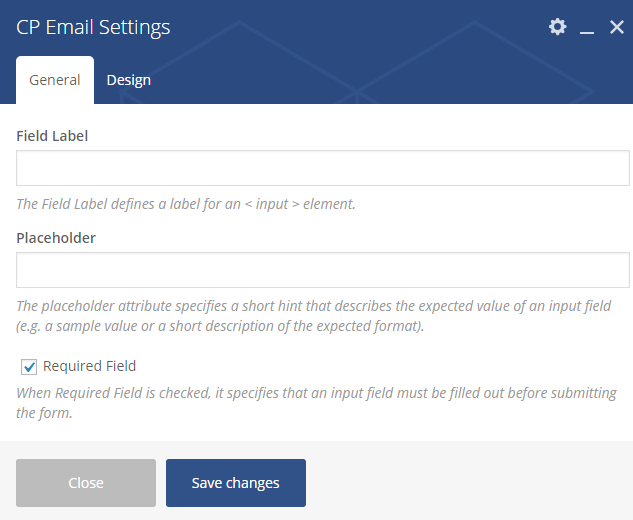
You can set a Field Label and enter a placeholder text that will be displayed to the user.
You can also decide whether you wish to mark it as a Required field.
Design Settings
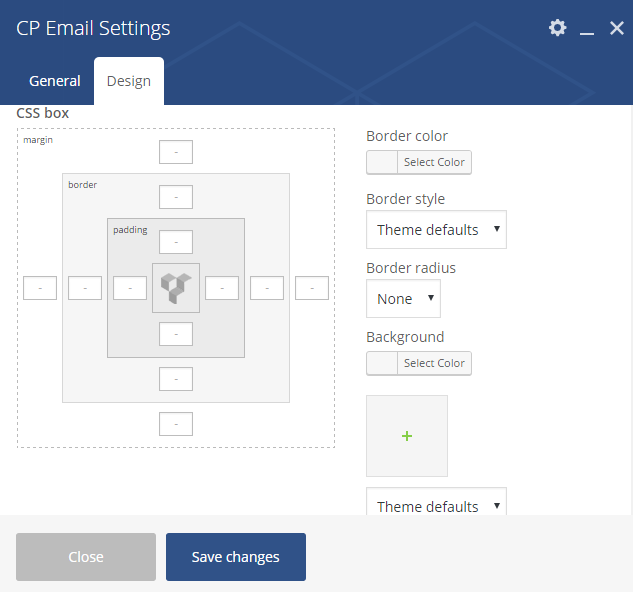
You can edit the border style, the color and the radius along with the background color of the element.
3. CP Textarea
Textarea can be used to enter a few lines of text
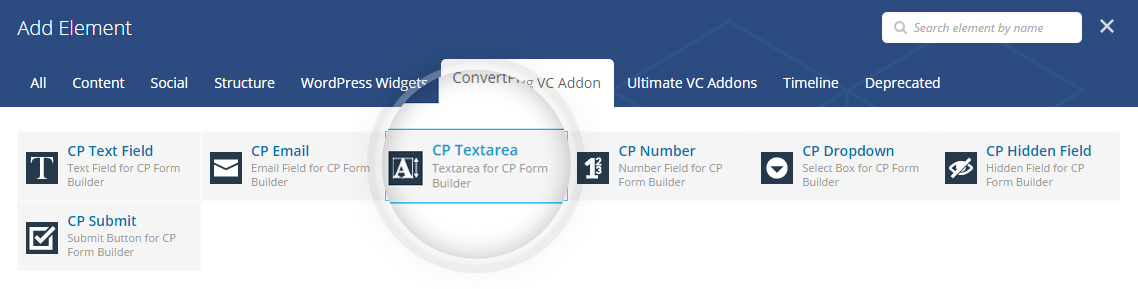
The Settings for CP Textarea:
General Settings
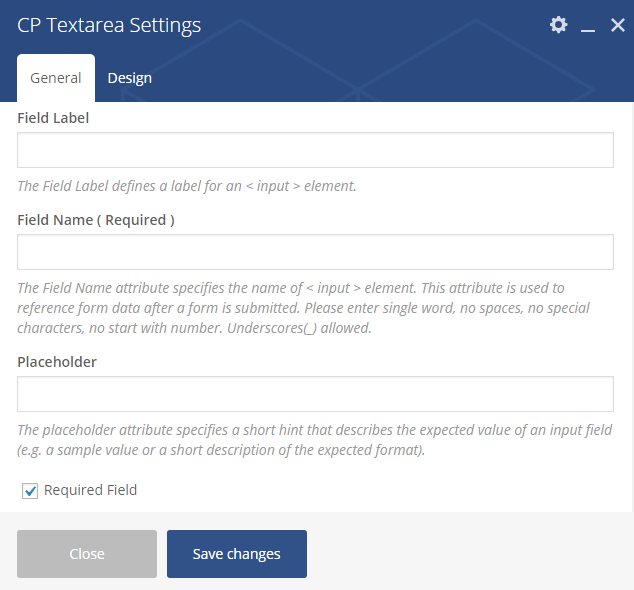
You can fill in the Field Label, the Field name and the placeholder text. You can also decide whether you wish to mark it as a required field.
Design Settings
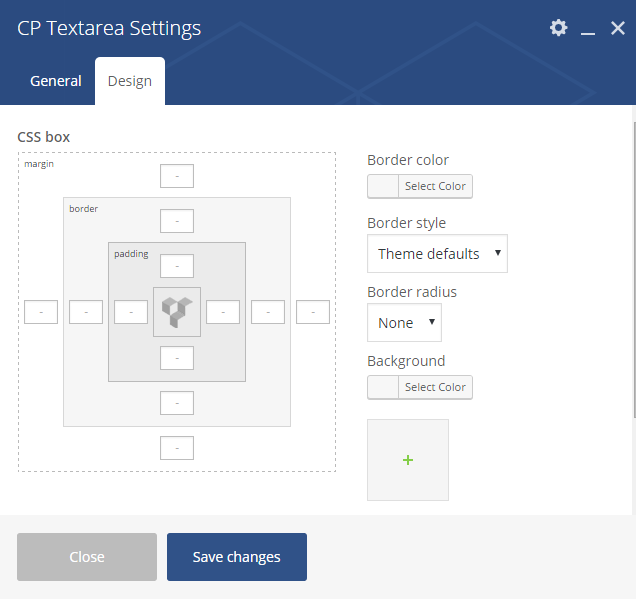
You can edit the border style, the color and the radius along with the background color of the element.
4. CP Number
The CP Number element can be used as an input box that accepts only numbers as the input value
The Settings for CP Number:
The General and Design settings of a CP Number element are same as those of CP Email or CP Textarea.
5. CP Dropdown
You can insert a Dropdown menu with a number of options using the CP Dropdown.
The Settings for CP Dropdown:
General Settings
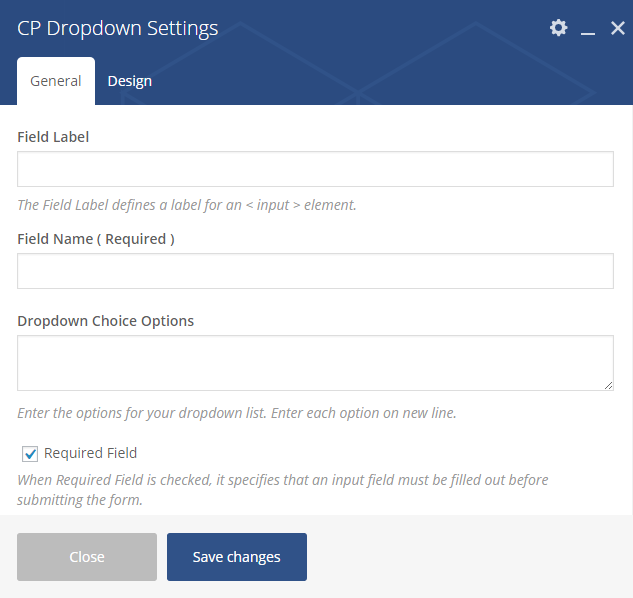
You will have to enter a Field Label, a field name and also add the choice options you wish to display in the Dropdown.
You can mark this field as Required too.
Design Settings
The design settings are same as the others.
6. CP Hidden Field
You can create a Hidden field that will help you accept hidden data without the users knowledge.
The Settings for CP Hidden Field:
General Settings
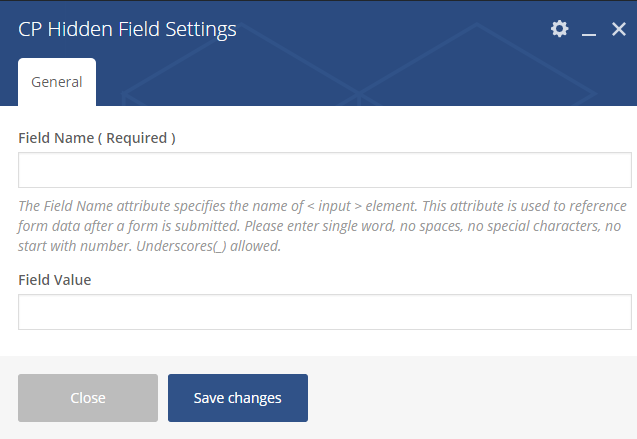
You will have to enter a field name and the value you wish to take in as input through the form.
7. CP Submit
The submit button is the Call to Action you wish to add on a page.
The Settings for CP Submit
General Settings
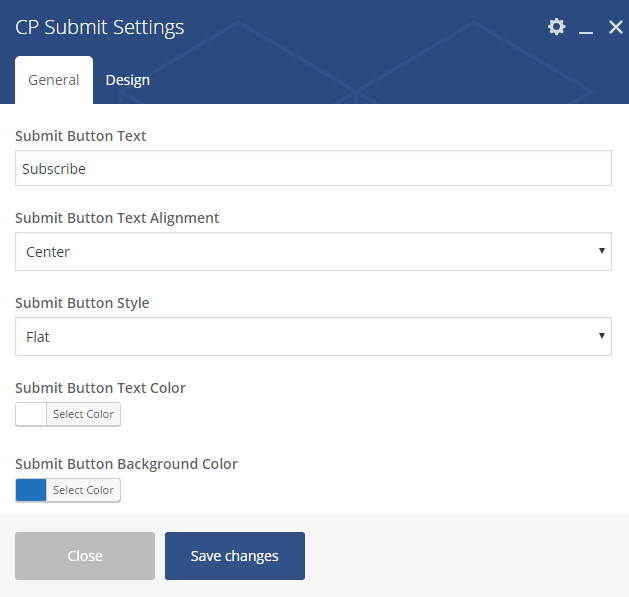
You can modify the text to be displayed on the button with the alignments and the color.
You can also select a background color and style for the button.
Design Settings
The design settings are same as the others.
Note: The CP Submit button is an important element without which the data obtained from the users will not get stored in the respective Campaign. You must include a CP Submit element in all the forms.
To Conclude:
All you need to do is, add the elements like any other Element available in Visual Composer. You can embed all the other CP elements within the Form Builder.
All the data submitted data will be stored under the Campaign you have selected. (through Connects)